Single sign-on: How to manage your AWS account using G-Suite (SSO)
The idea behind SSO it’s pretty simple, you login into only one place and can use multiple applications.
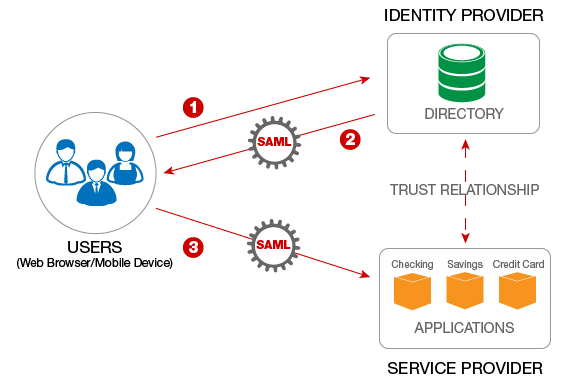
Single sign-on (SSO) is an authentication scheme that allows a user to log in with a single ID and password to any of several related, yet independent, software systems
Benefits of using single sign-on include:
- Mitigate risk for access to 3rd-party sites (user passwords not stored or managed externally)
- Reduce password fatigue from different username and password combinations
- Reduce time spent re-entering passwords for the same identity
- Reduce IT costs due to lower number of IT help desk calls about passwords
- Easier onboarding/off-boarding process for new people in your company
How to leverage G Suite for SSO?
First of all, let’s clarify that there are multiple ways of archiving this, you could use LDAP or even SSO from AWS; this approach is to accomplish this using G-Suite.
To be able to start doing this you need to be a super admin of your G Suite account.
1. Create your custom attributes in G Suite
- Go to https://admin.google.com/u/1/ac/customschema
- Add the custom fields:

We are going to add: Role and SessionDuration. Pay extra attention to the “Multi-value” option for the role, as we most likely want to add more than one role for each user.
2. Create your SAML app:
-
Go to https://admin.google.com/u/1/ac/apps and navigate into "SAML Apps"
-
Click to add a new app, and choose "Setup my own custom app"
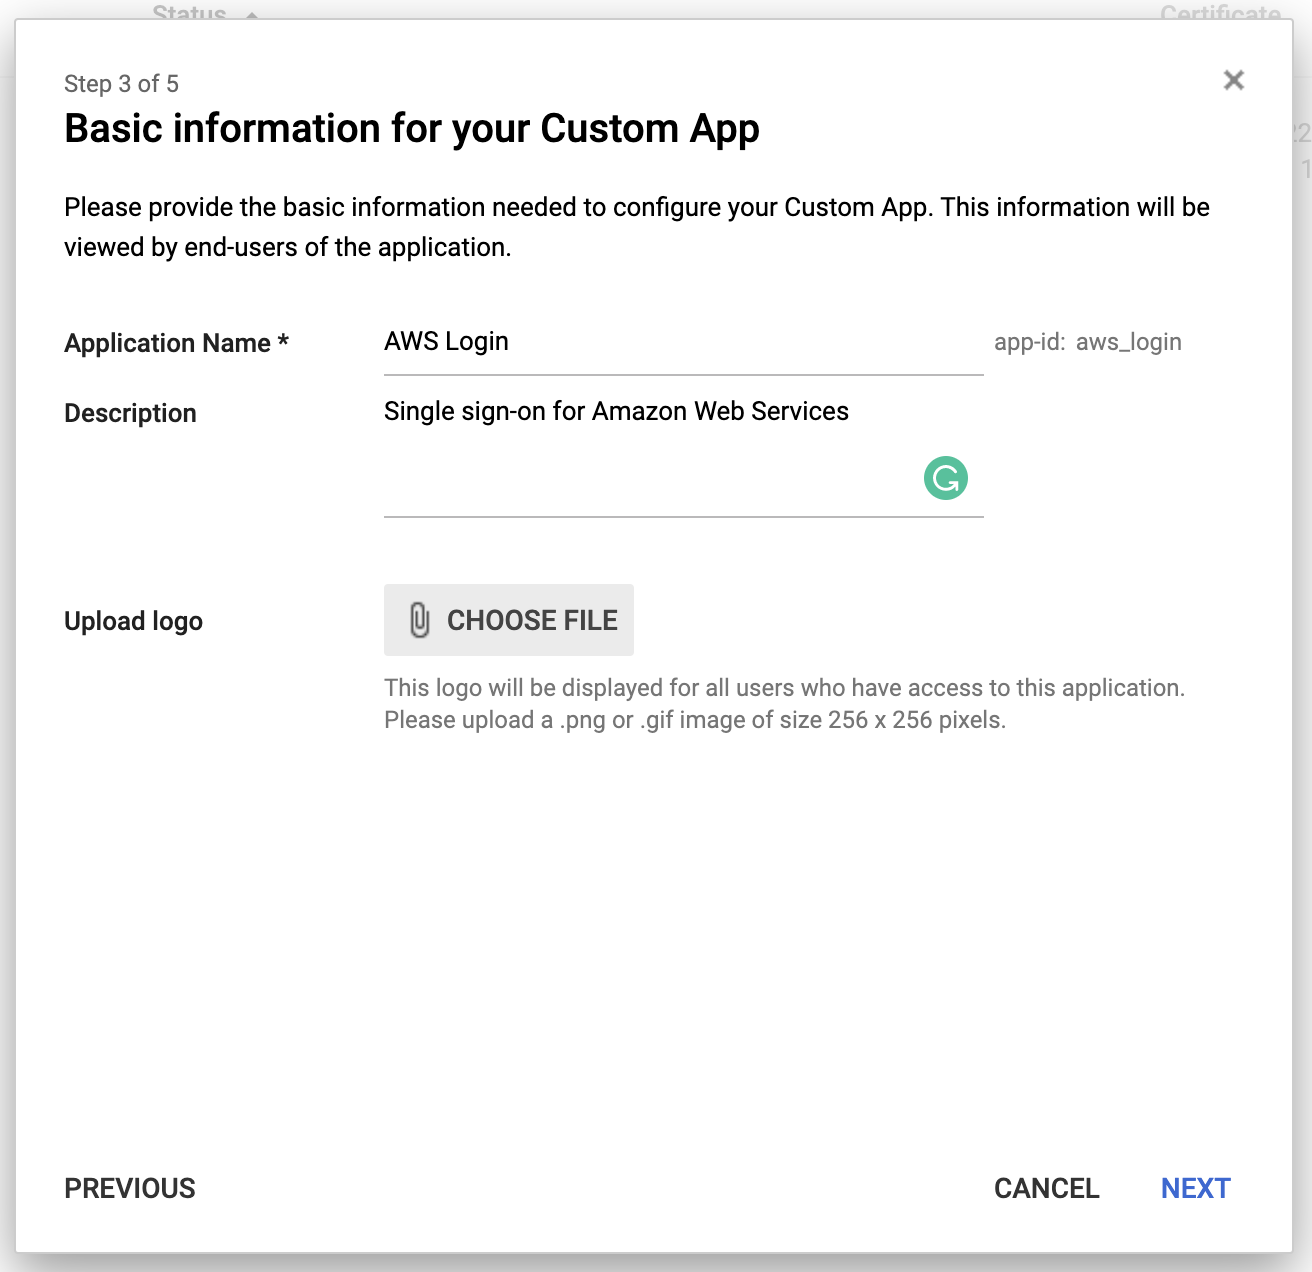
-
Download the certificate and store them in a safe place
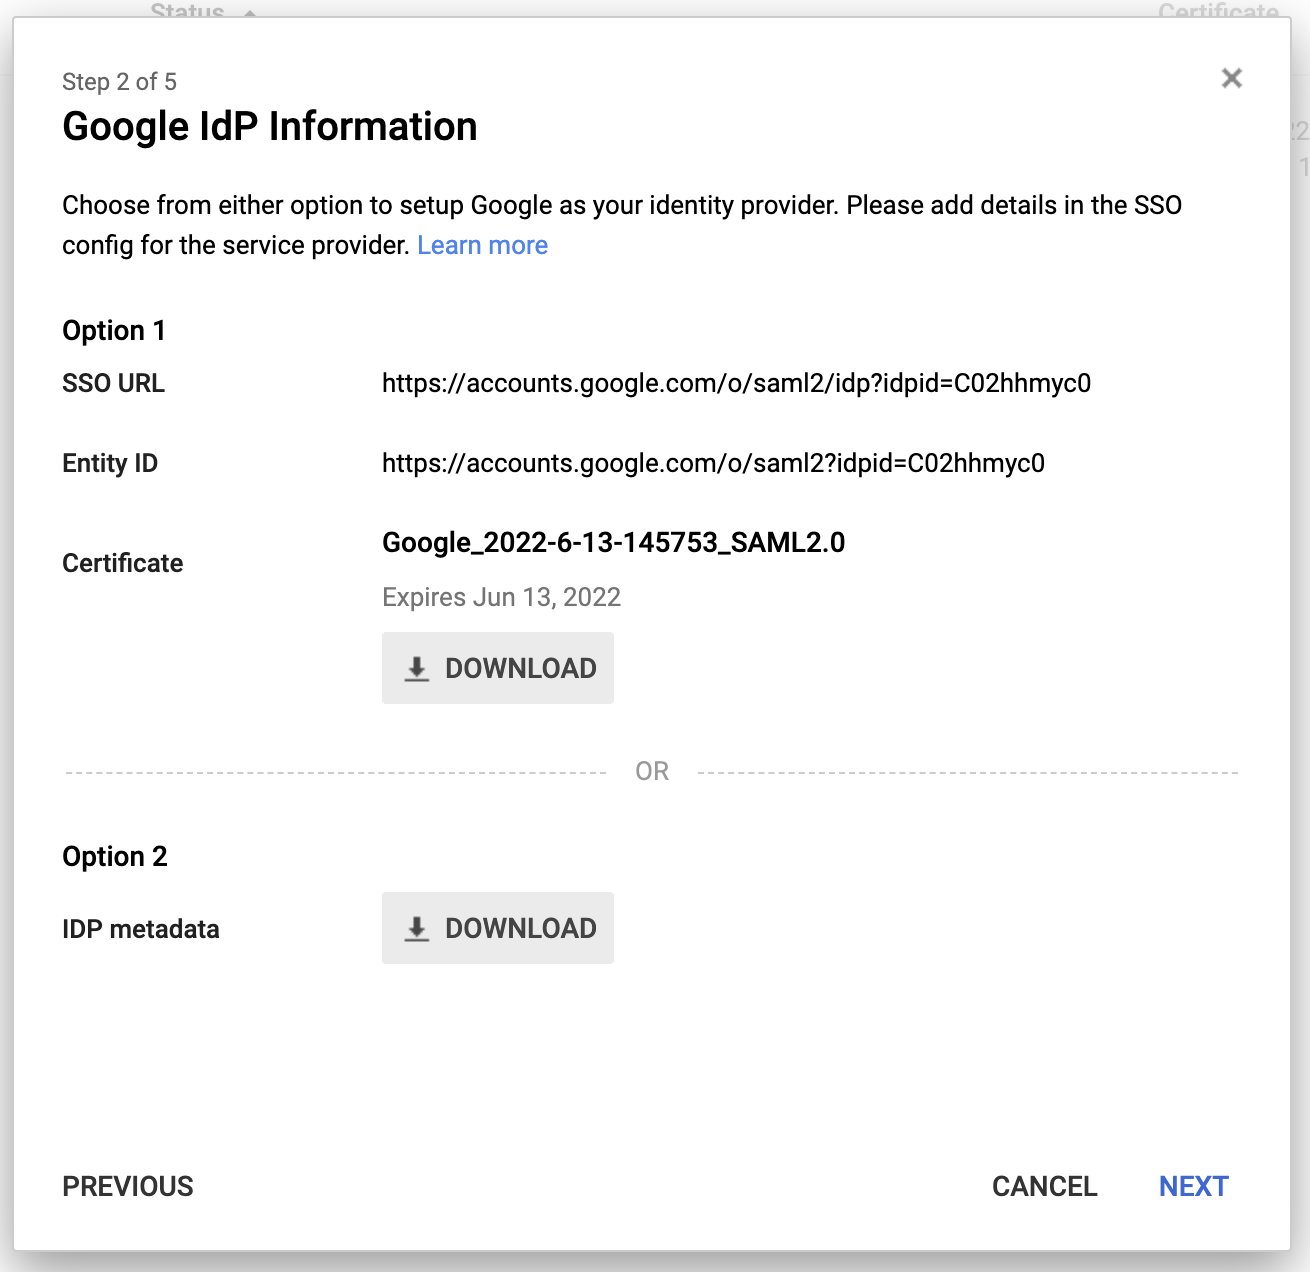
-
Skip the first screen and in the second one, you can complete the details. This is the only way you can provide a proper logo to the app, and the only time you get this chance, there is no way to update the logo app once it’s created so be wise!

-
Now we can fill in the service provider details
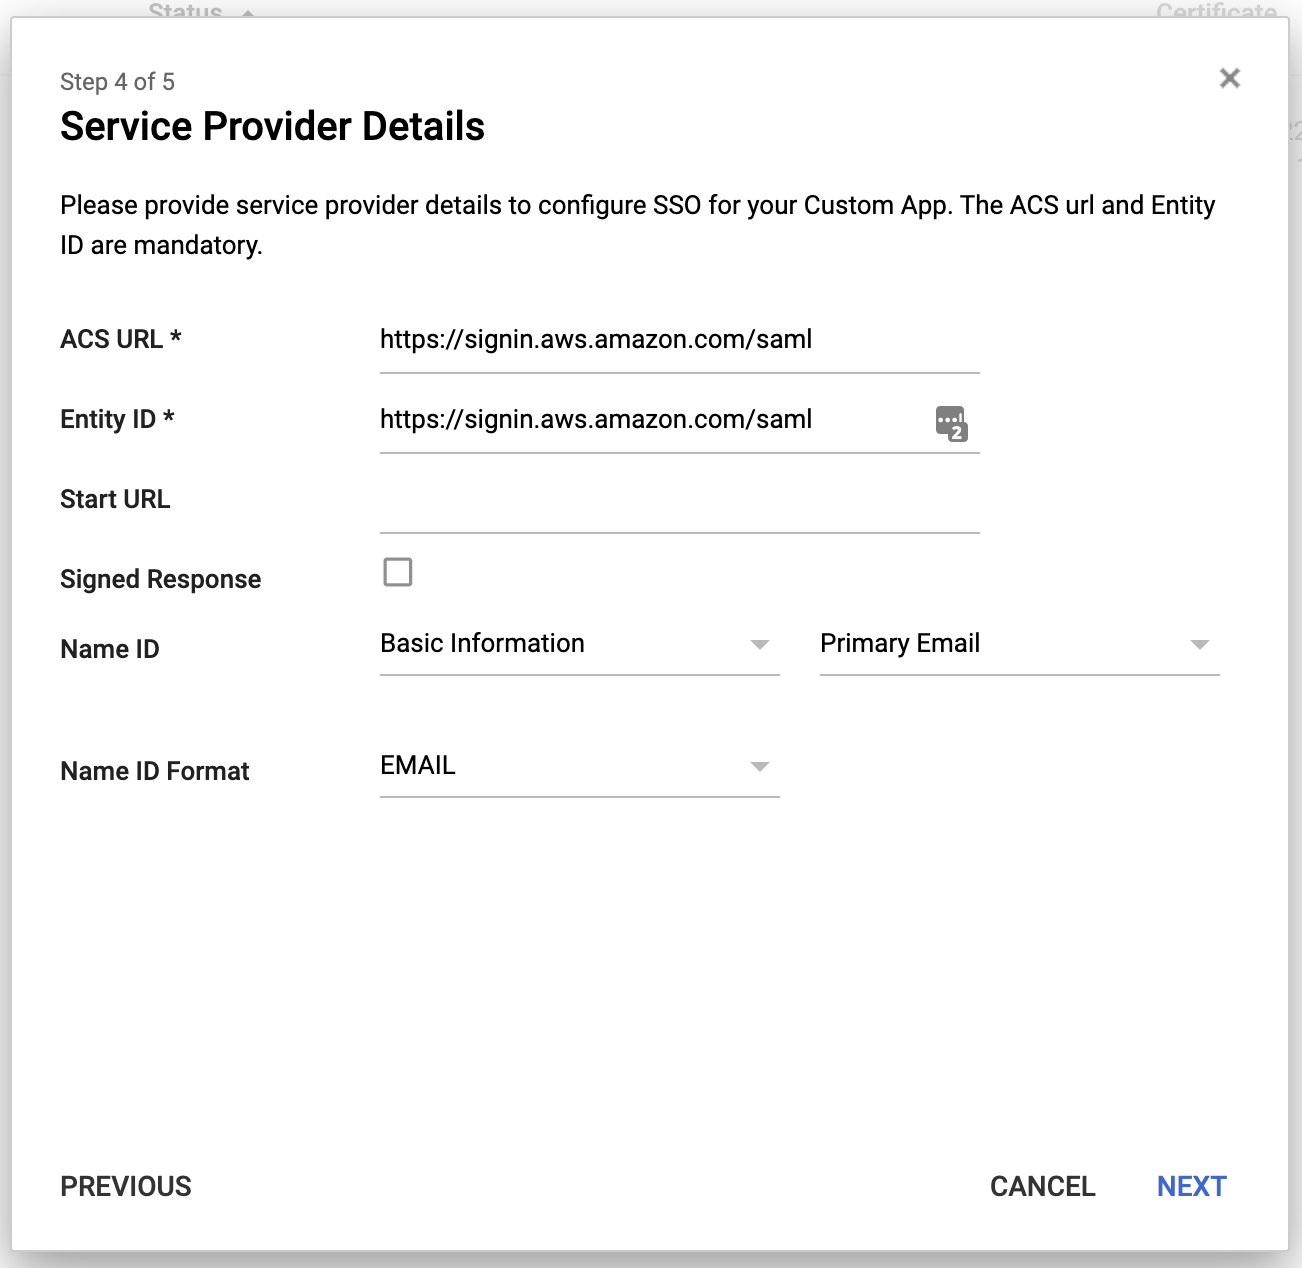
-
Using the previously created mappings we can map our user attributes to the fields required by AWS.
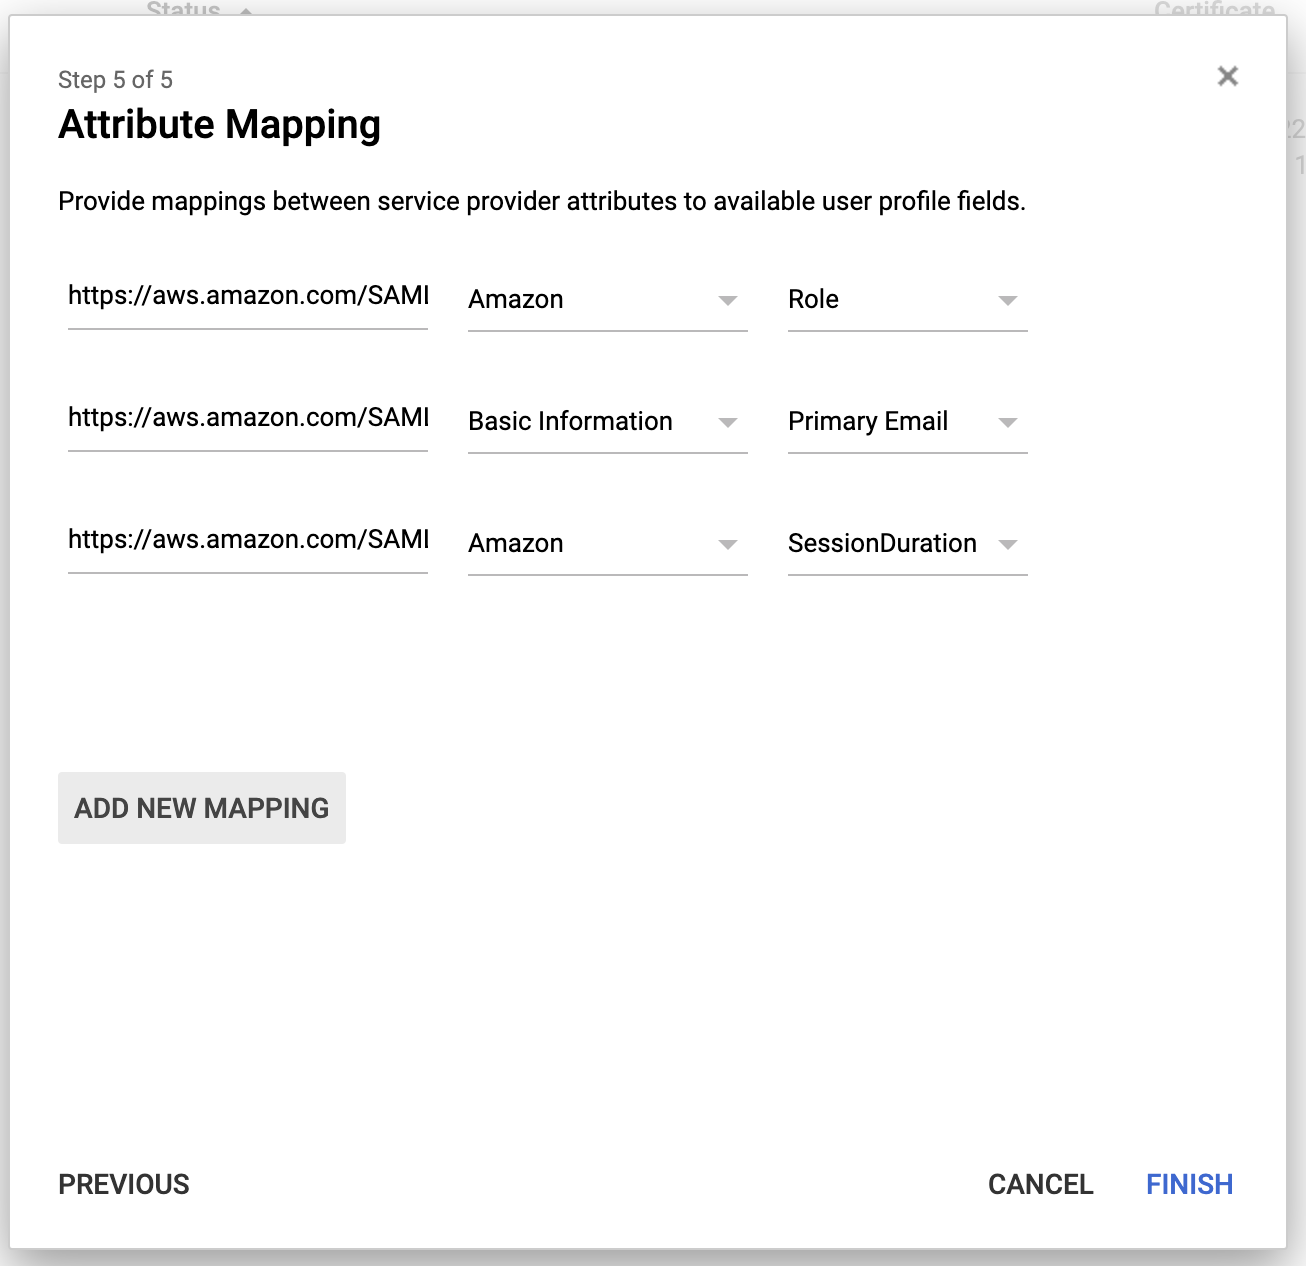
The full URL for each attribute (in order):
- https://aws.amazon.com/SAML/Attributes/Role
- https://aws.amazon.com/SAML/Attributes/RoleSessionName
- https://aws.amazon.com/SAML/Attributes/SessionDuration
Once we created the app we are going to be able to see the app in our app dropdown:

3. Creating the identity provider in AWS
Once the app its created we can log in and it’s going to send the details to AWS, but what’s linking our G-Suite with our AWS account?
For this, we need to enable a new identity provider in our AWS account.
- Log in to the AWS console, and navigate to the IAM service
- Go to the "Identity providers" option and add a new one
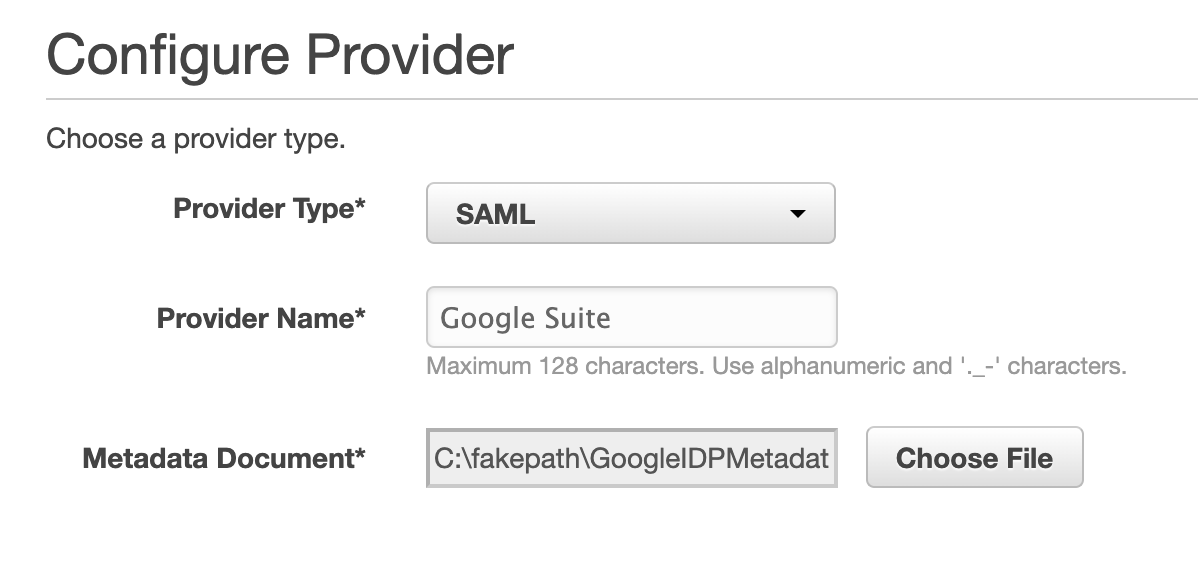
Provide the certificate document from the app we just created in G-Suite.
4. Assign roles to the users
In G-Suite you can navigate to the User profile and add the new role into the new custom attribute.
For this example the role I’m going to use "GooglePowerUserRole", this role was previously created to give access to as a PowerUser into the AWS account.

Remember that the format we need to follow is:
<RoleToAsume>,<IdentityProvider>
Once we login into the app we are going to see a similar screen to this one:

This is basically telling you that you can assume the "GooglePowerUserRole" into the account “511111111111”.
We could also replicate the identity provider into multiple accounts and let the user access different roles into different accounts.
Summary
We saw what are the benefits of SSO, and why we should think of implementing it in our organisation, to keep it even secure I’d recommend enforcing 2FA in your G-Suite account, but that’s another discussion.
Also, we saw how to configure both G-Suite and AWS to work together, allowing our users to only log in once.
Remember that if you are planning on implementing something like this you have multiple other ways that could provide you with the same functionality as using LDAP or services like OneLogin or Okta.